My Personal Simulator Build

Version 2.0


A simulator is always an 'On-going project'


As it says above, a simulator rig is always an on-going project, if you decide to make one for yourself then you will constantly changing it, modifying it, and adding new things.

For years I have stuck with driving games, American Truck Simulator, European Truck Simulator, Fernbus and Tourist Bus coach driving simulators, Forza 4, and Grand Theft Auto 5, so my personal simulator was designed with these needs in mind, I designed a 'Car Style' cockpit around a real car seat.

My original Rig had to fit certain usage needs, it had to be both compact and yet hold everything I needed,  being as small as possible due to room size restrictions. The rig not only needed to accommodate use as a driving simulator with it's steering wheel and gearstick, it also had to double up as an office space, and somewhere to sit comfortably with easy access to my keyboard where I could spend many hours when writing my books. You can see the original build and the final result in the previous section by clicking here.


BUT THINGS HAVE CHANGED AGAIN!

Along with driving I have always been interested in aircraft and flying, yet the cost of building an aircraft simulator was way beyond the scope of my financial situation.  But now the prices are beginning to come down a little, and second hand controllers are more available in the marketplace, making the possibilty far more reachable.

The simulators have matured and improved greatly, they are no longer 'Arcade Games', and now compete with professional aircraft training simulators for their realism.

So I decided now was the time to get into it!


Mobirise Website Builder

Microsoft Flight Simulator 2020

The best flight simulator available to the public, Microsoft's flight Simulator has been around for many years, the current version was released in 2020, but a new release is expected in 2024.

MSFS 2020 as it is commonly known, covers both Commercial and Military style aircraft, both fixed wing and helicopters.

It comes with a set number of aircraft dependent on which version you buy, but there is a strong 'Mod' Community which has many others, sometimes free.
There simulator is compatible with most controllers, and there are endless additional components available such as Radios an navigation aids, and many add-on programs that add to the immersive realism.

So why do I need to make changes to my rig?

and what do I need now?

Simulation Gaming is not the only thing I use my computer for, therefore whatever I end up building needs to enable me to continue to operate it for ALL my other tasks.

I suffer a lot with severe back pain, which requires me to sit upright. I spend many hours creating and maintaining many websites, and I am also a published author and spend many hours on the keyboard writing. Therefore posture was a very important factor to consider, and balancing a keyboard across my knees was just not going to work.

The above still very much applies, I need the rig for all that I needed it for before, but now it has a whole new set of needs.

Driving a simulated vehicle, whether it a Car, Coach or Articulated Truck basically needs three things, a steering wheel, a gearstick, and a set of pedals. However when it comes to flying an aircraft these controllers are quite useless. The controls used for flying require a totally different style,  either a wheel type controller that has extra ranges of movement, or the use of a joystick, or both. The pedals used are also very different, they are not used as a throttle or clutch as this is normally done with levers, instead they are used for steering along with braking.
 
The type of aircraft flown too can require different controls, a Helicopter is again very different from an aeroplane

************

The previous cockpit did well to meet my original needs, but just did not have the room for all these new controllers, I could not afford toi start from scratch and totally rebuild it, nor did I have the room to make it any larger. so I realised that I would have to redesign it, somehow incorporate all the new controllers with all what I had before, but without having to totally dismantle one system so as to be able to use the other.

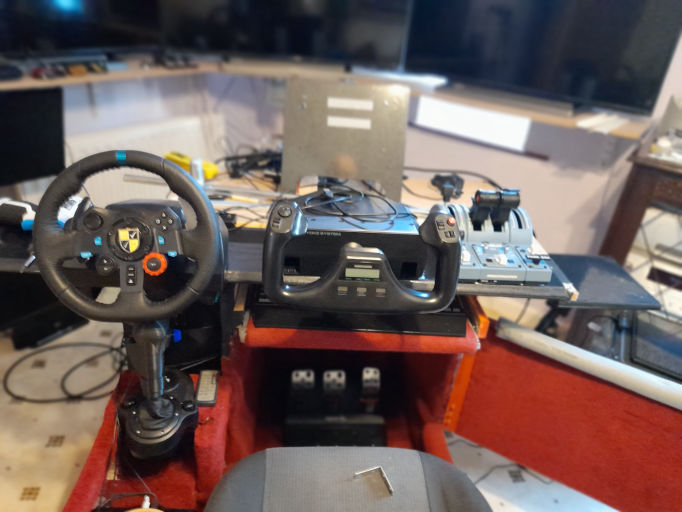
This required having the original normal Logitech driving wheel alongside a new push-pull style flight yoke and the new throttle quadrant, but it had to be quickly moveable so that I could access both without changing my seating position.

Before any die-hard flight simmers comment on the layout,  I do know that certain controls are normally in set positions, That a 'Captain' sits on the left and uses a flight stick with his left hand, and the throttle levers with his right. However I am right-handed,  and it is my right hand that I use for precision, e.g using a mouse, steering, operating buttons etc. Due to my several previous strokes I do have a little weakness in my Left side, and because of this, and the fact that I also have the driving controls present, I could not mimic the exact layout of a cockpit, but placed the controls in positions which best suited to me.

I also intend to fly a variation of aircraft, plane and helicopter, commercial and military, and so needed the ability to use a flight style joystick with either hand, meaning that instead of being mounted to one side as in a traditional modern commercial aircraft, it needed to be fixed centrally.

New switch panels and instrument dials would be needed too, so new or additional Button-Boxes were also needed.

************

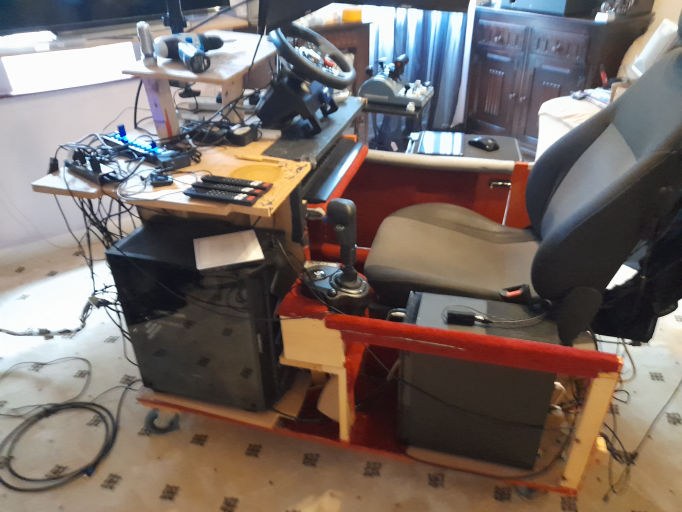
The original cockpit worked extremely well, and with everything built onto and into the unit, it saved a lot of room in an already limited space. It was built on large supermarket style castor wheels for easy movement, as I often needed access to the rear of the computers, plugs and the wiring, and of course for cleaning. But mounting 7 screens, one being a older 40" flat television, along with two computers, various switch panels, a printer, and surround sound system the weight was increasing more and more. It was no longer easily moved by just one person, so a lighter redesign has become necessary. 

Due to the advancement in graphics, and the sheer beauty of the scenery in Microsoft's flight simulator, and in other regularly used top-end graphic games such as Red Dead Redemption 2, it was also time to update my monitors. It now needed 4K and not the 1080p of old, and it also needed bigger screens to add to the overall immersion. So an order was placed for three 43" 4K HDR televisions, these were the biggest screens that the corner of my living room could handle, as the larger the screen the further away from them you have to sit. 40" screens would have been suitable and perhaps even better, but it seems that the days of purchasing smaller 4K screen televisions are over, they are no longer sold in the shops, and now start at 43" and go up to a 100+"

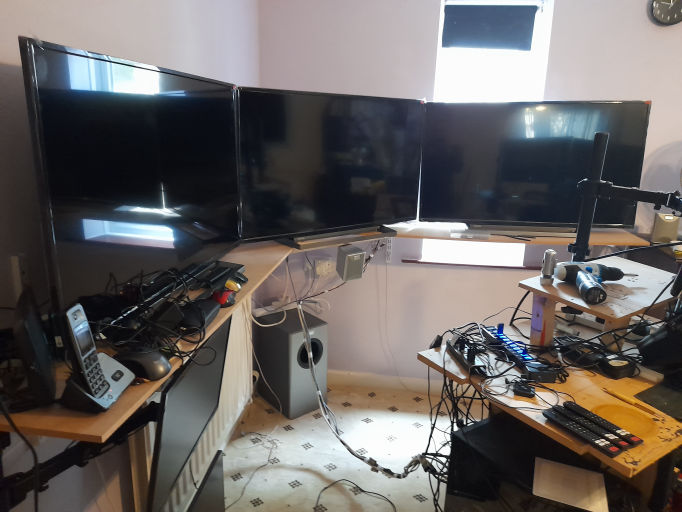
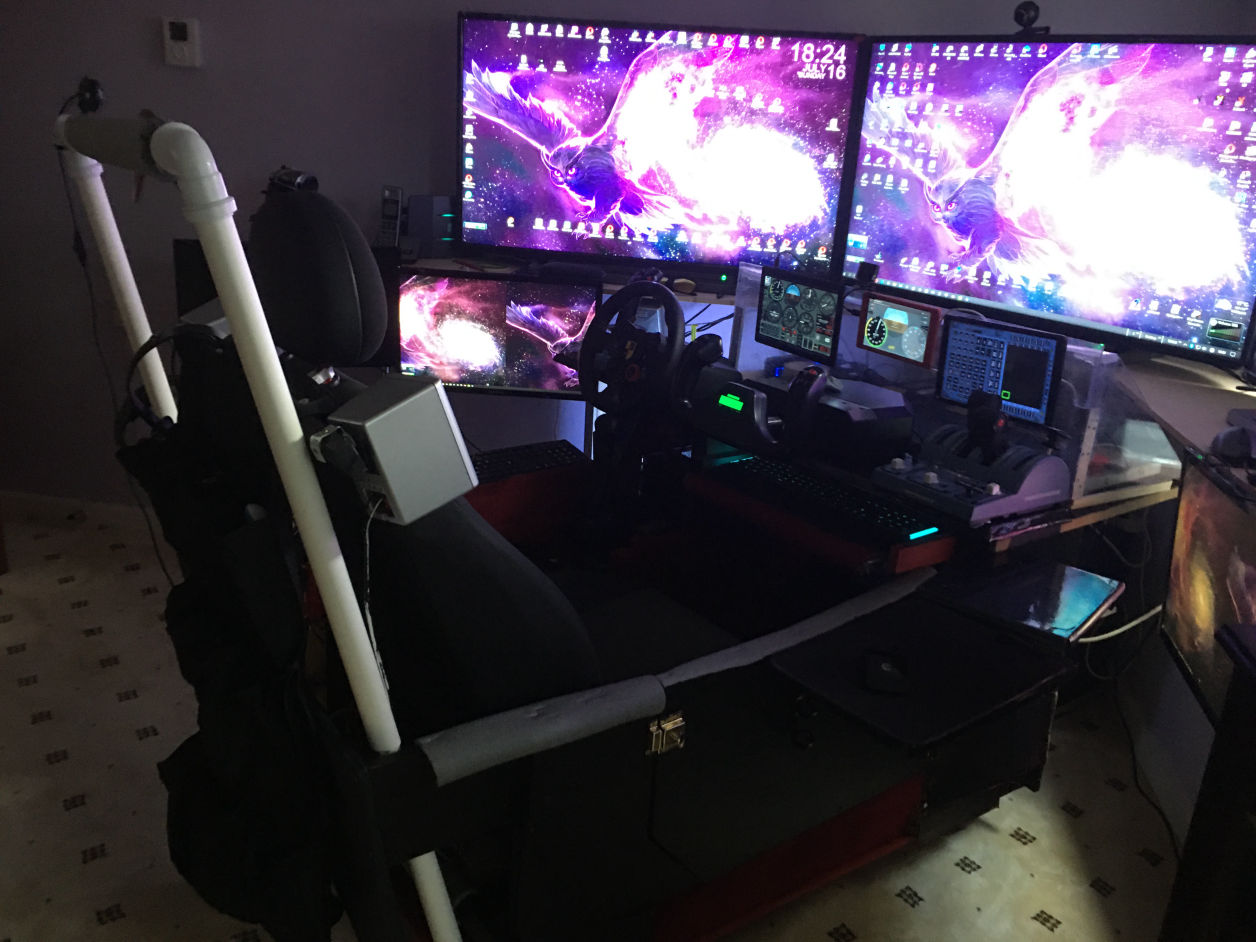
These large televisions if mounted as direct replacements, would make moving my cockpit totally impossible. So I needed to separate them from the rig and mount the televisions onto the wall. However mounting a large TV diagonally across a corner is not the easiest thing to do, and my walls are mainly plasterboard/Dry wall, and being quite weak directly mounting adjustable brackets to the wall was a little worrying. Instead I decided to erect two strong long shelves, and create a corner-piece to give extra support to the central angle TV, and used chrome tubes underneath to give extra support and to stop the sagging.

The existing 22" monitors were then refitted using the original mountings, not to the rig itself, but to the shelves so that they hung below, along with the two front and the centre surround sound speakers. This now left the front of the rig clear to redesign the
dashboard area, making room for tablet sized displays and for some of the buttonbox controls. Weight saving would come from removing the high overhead 40" television, and the heavy bass speaker and surround sound amplifier from the front of the unit.

So from here on I will be showing the new build and all the modifications it takes to make work.

The New Build

Mobirise Website Builder
Strip-Down

The first job was to strip away the old screens, mounts and supporting wooden framework, rear printer shelf, DVD and Amplifier. and also the side panel to access the old wiring.

Mobirise Website Builder
Bigger Displays

Building corner shelving for the new 43" screens, and moving the heavy surround sound Bass speaker down to the floor in the corner, and fitting the 3 front speakers to shelves. The heavy amplifier, radio, DVD and Wi-Fi printer was moved into an adjoining Hi-Fi cabinet.

Mobirise Website Builder
Sliding Shelf

Mounting all the controllers onto a sliding top board which would enable quick transition for Driving/Flying.
A small shelf was also made at the front of the unit to store the extra pedal unit, making it easy to swap over.

Mobirise Website Builder
Expanding the screens

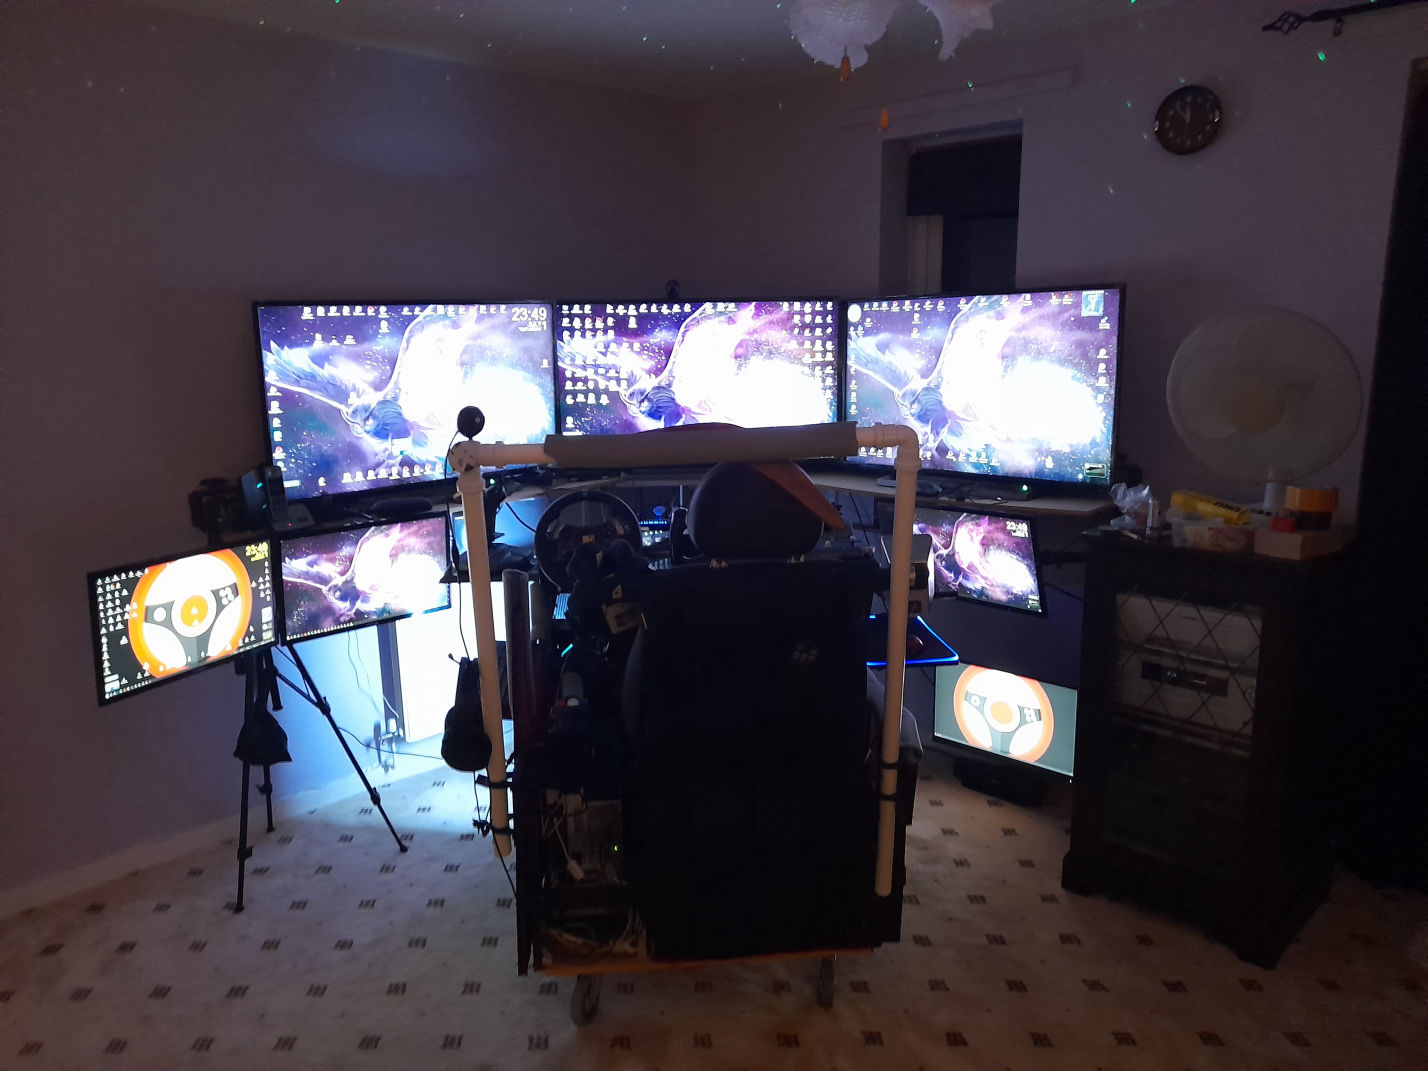
The original 22" monitors were suspended from the shelves, two of which are connected to the second computer which is used to run OBS, Discord, and Twitch control panels when streaming.

Yes I had previously tried the idea of a sliding shelf back when all I had was a Desk, and I knew that the aggressive motions of the force-feedback steering wheel could move the shelf, so this time it had to be designed differently.
After fitting a front edge strip to stop the shelf being pulled forward towards the seat, I fitted a second guide strip to the rear to stop it sliding forward, and made use of sliding cupboard locks to stop the shelf from lifting up. To change from driving to flying only requires the twisting of two bolts that hold it in place.

Mobirise Website Builder

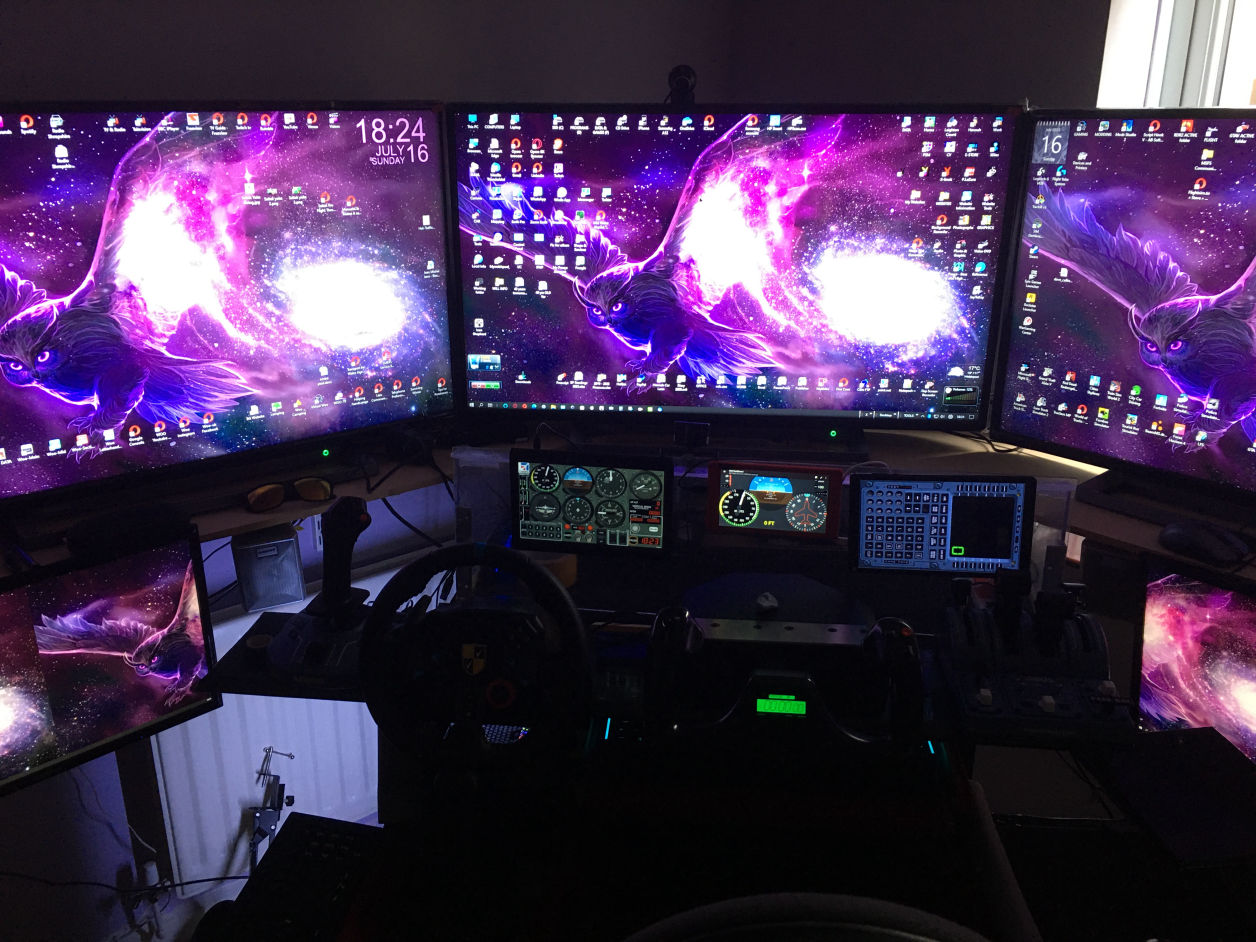
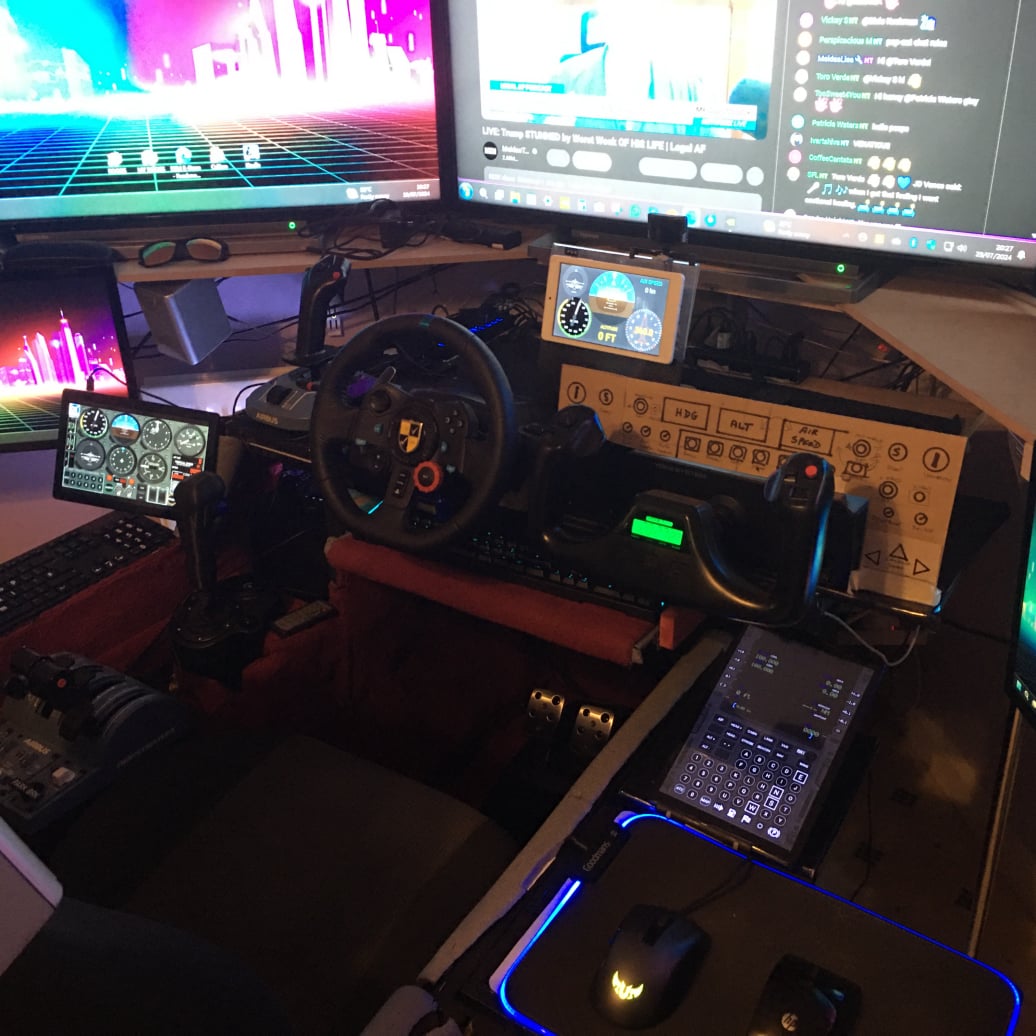
A new full-width dash-panel was built from Plexiglass, and the three tablets reaffixed with Velcro. Great for Driving, but needs more for Flight.

The unit was also repainted black.

Mobirise Website Builder

The slightly shorter rig now fits more snuggly up to the centre screen. The plastic 'roll-cage' tubing allows for mounting of rear speakers, cameras and lighting, and gives support when I need to use the foldable springy 'Green-Screen' behind the seat. The mouse shelf was reattached to the swing door, and secondary PC keyboard to a side shelf on the left.

Mobirise Website Builder

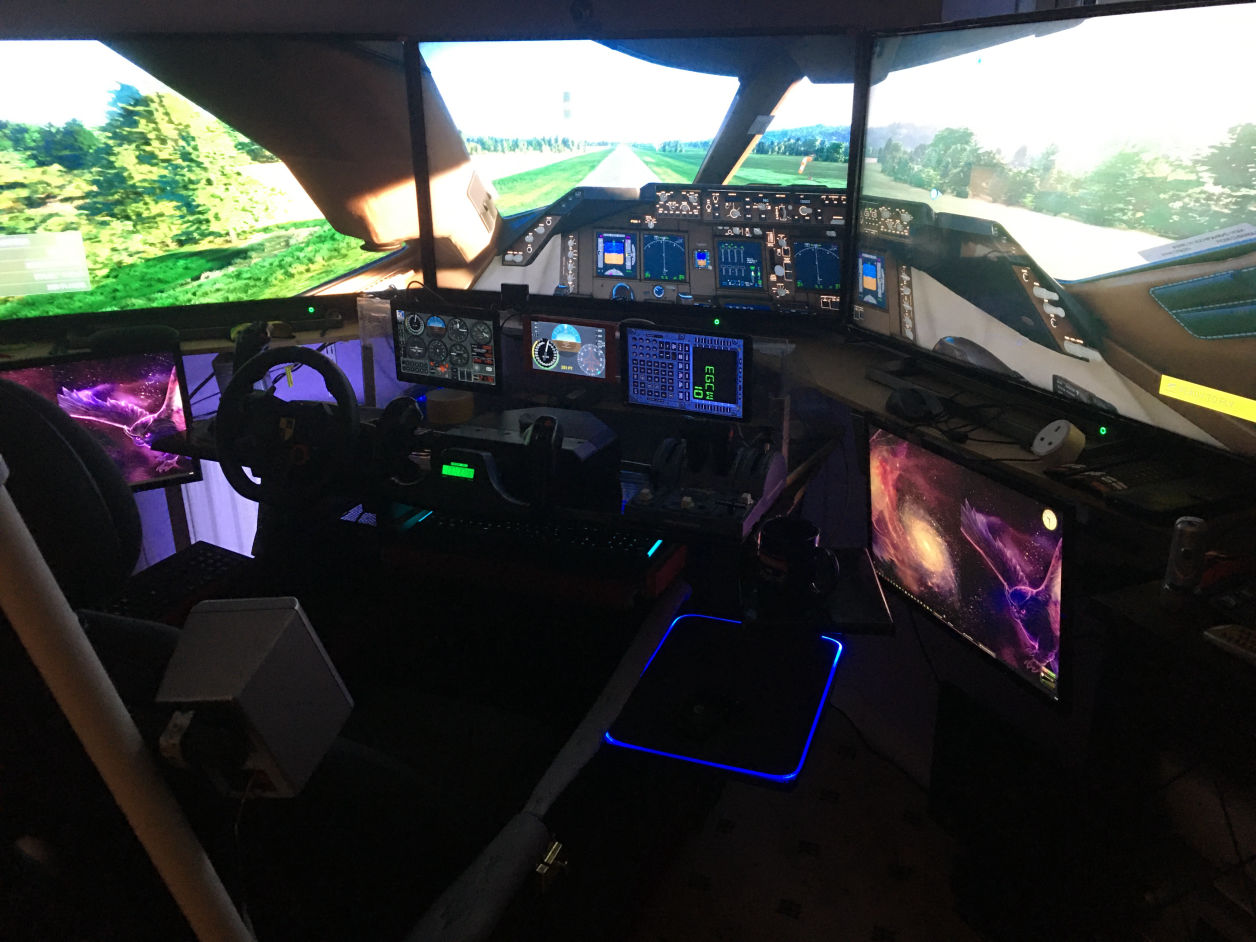
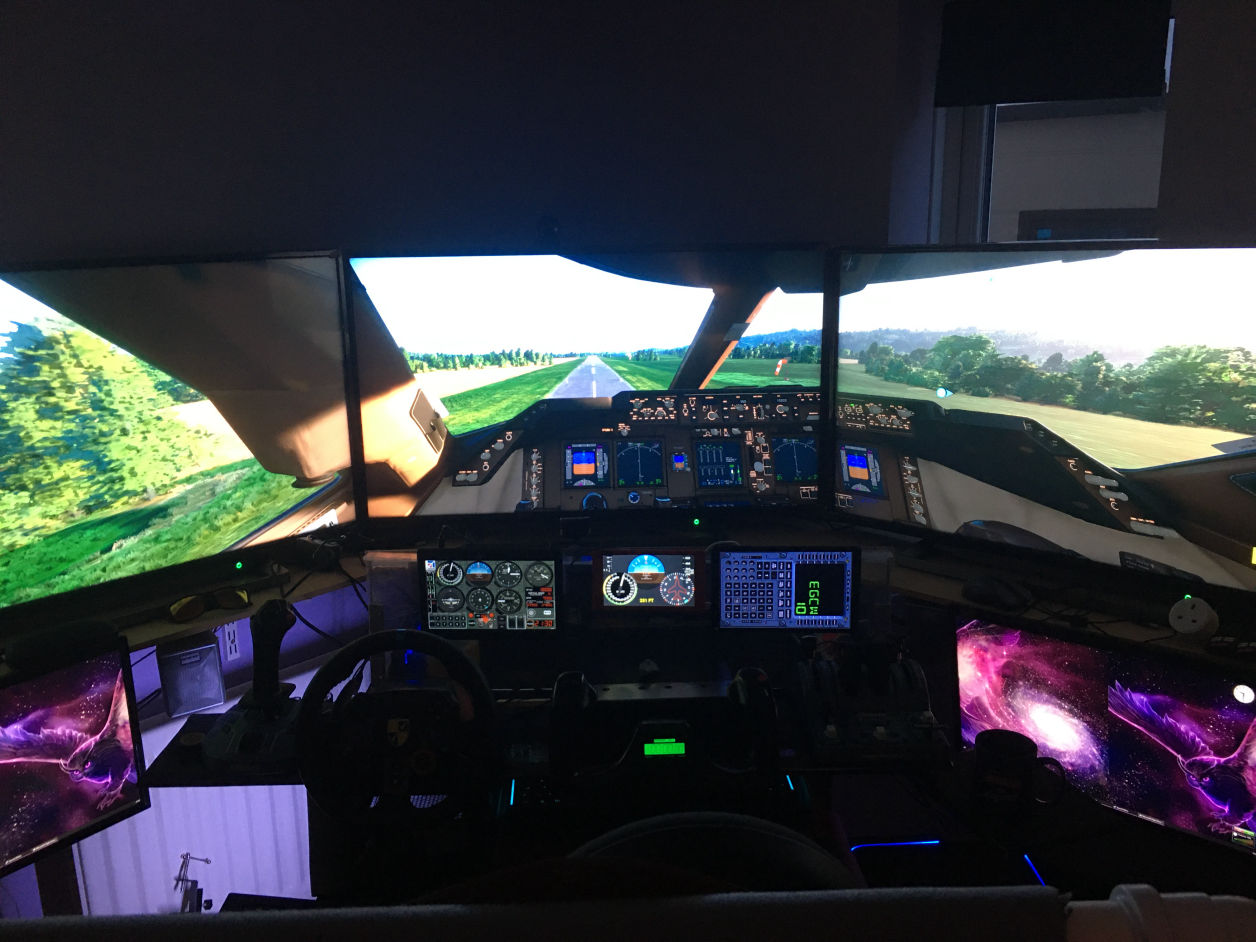
The 747 Jumbo is a bit on the large size and not meant for Welshpool Airport

Mobirise Website Builder

Ready for flight

Mobirise Website Builder

Redesign of Indicator Unit

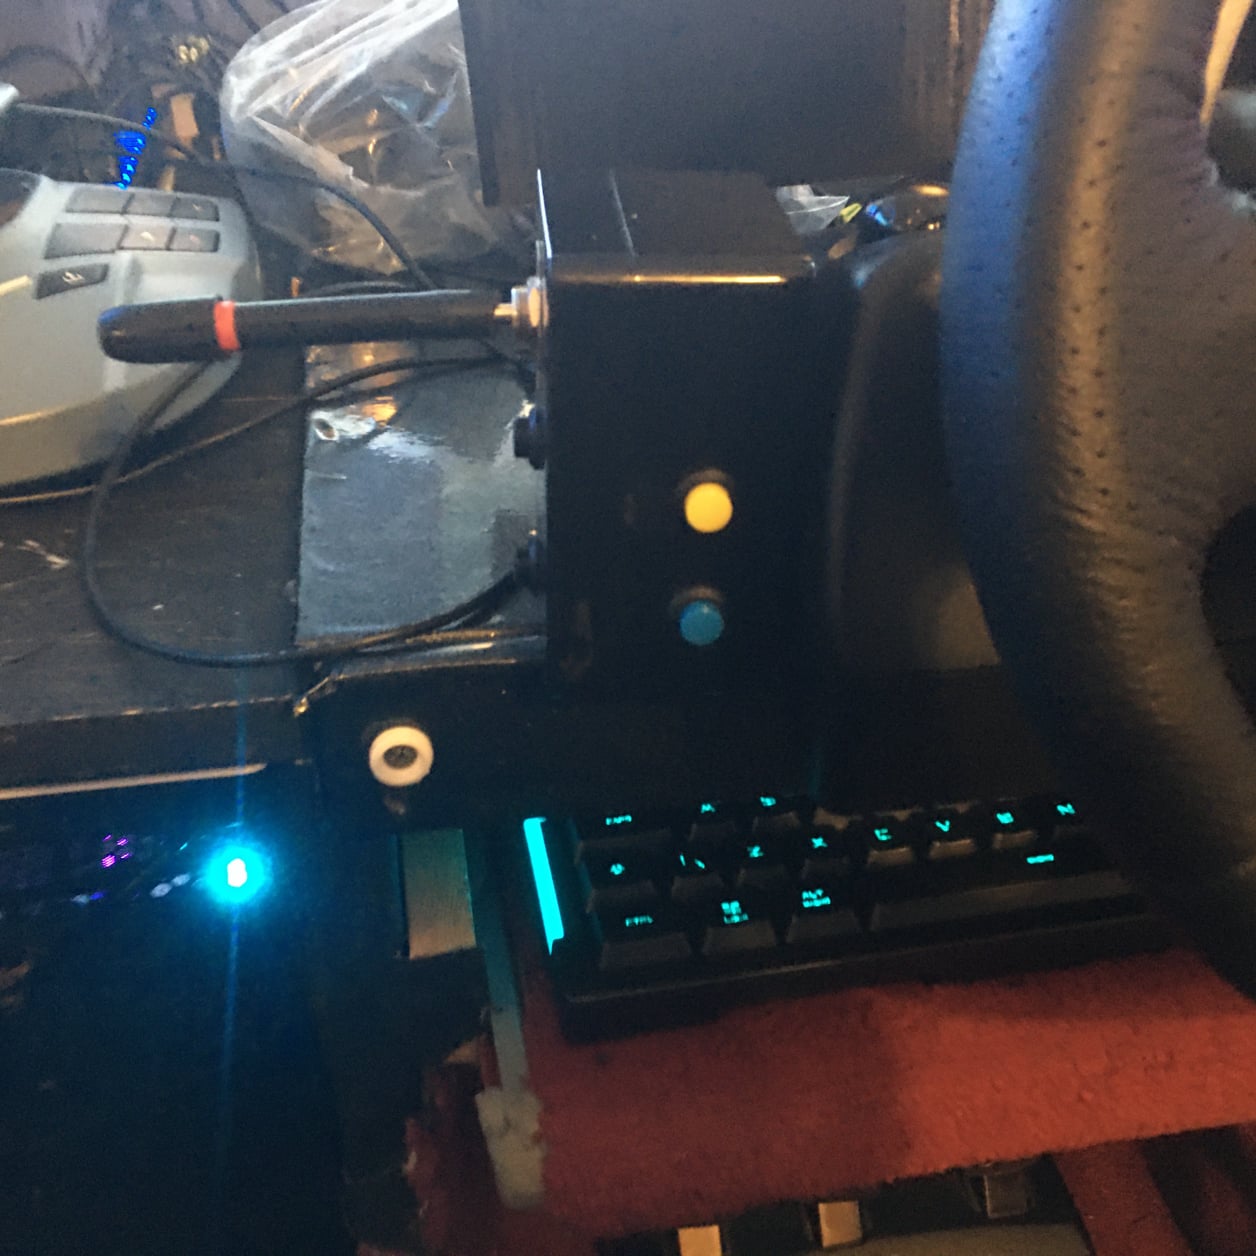
The indicator stalk made from an on/off/on momentary switch and connected to a USB zero-delay board was refitted into a small plastic project box, along with four push buttons to control the Hazzard lights/Beacons/ Wipers (up/Down), and secured to the sliding shelf tight beside the driving wheel.
I used a free program called 'Joy-to-key' that enables you to assign any keyboard key/button to another button option.

WHY BUILD A DASHBOARD?

Keyboards are not so user friendly when you need hundreds of buttons.
So what other options are there?

The keyboard may have over a hundred keys, but with the complexities of simulators you will soon find yourself struggling to find an unused key to operate that vital control. There is also the remembering of which key does what, and to be honest I get confused over buttons on even the simplest of games.

Button-Boxes, Tablets, USB encoders, Arduino controllers.
My original setup made do with a 10" Android Tablet, running a program called 'Sim-Dashboard Server'. an amazing and very cheap program that allowed you to create your own design of virtual Button-box on a touchscreen tablet. It was so good that I now have three tablets running this, allowing me to select a button instantly. They also display dials and data, and maps, and multiple screens can be designed that you can change with just a swipe, an ideal resolution for Driving Simulators and can also be used for many other games for when you need to make a quick selection of weapons or actions.
However they do have one drawback, they are suitable for push buttons and switches, not for rotary style knobs.

Flight controls require many 'tuneable' dials, rotary style knobs that can set Altitudes, Speeds, Direction, and rotary encoder style switches that can be used to to make multiple choices of options. etc.  Trying to make a touchscreen operate such a control is both tricky and very distracting, causing you to look away from the screen to ensure its worked.

So I make use of ALL these options, I use physical push buttons wired to a USB zero-delay board for things like my Indicator Unit, and I use Virtual button-boxes on my touchscreen tablets which also display speedometers, or flight instruments. The reason I am building a dashboard that will run using an Arduino board is to enable the use of turning knobs and selectors for radio frequencies, and selection of altitude, direction, airspeed, and the display of Landing Gear indicators. Having the most used displays such as Altitude, Speed, Direction, always in visual sight along with the Flight angle showing on the smaller centre tablet will mean my eyesight can remain focused forward on the main external view.

Mobirise Website Builder

Redesign of Dashboard

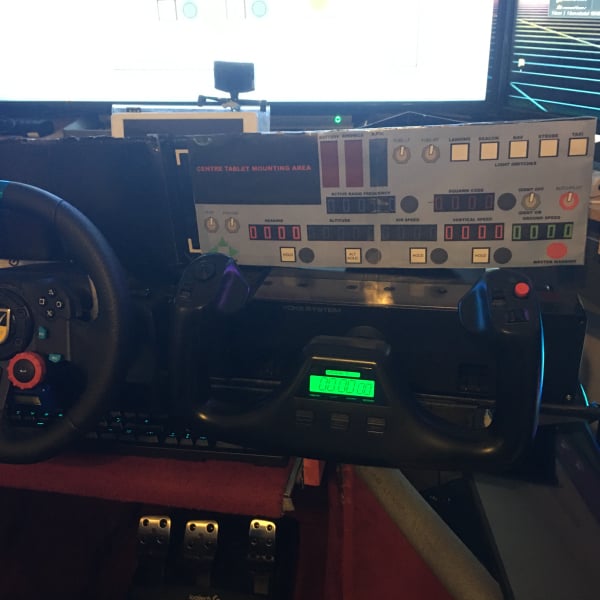
A dashboard panel with physical switches, knobs, and electronic segment displays will make operating the major controls easier to do without distraction. Memory will eventually kick-in making it possible to operate without even looking.

The upright tablet using Sim-Dashboard can display the main control computer, whilst the centre and left tablets can display the Flight angle controls and other guages.

ALWAYS MORE THINGS TO DO

I cannot stress enough, that a Simulator is always an on-going project.  Experience when using, or the purchase of additional items can make you redesign your simulator layout over and over again.

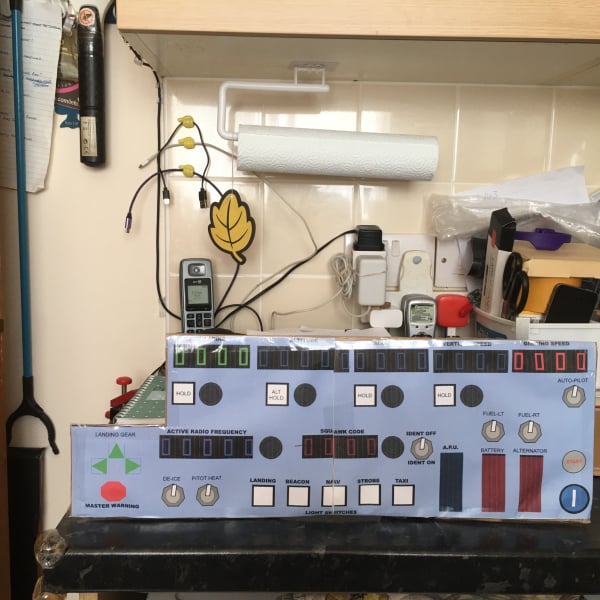
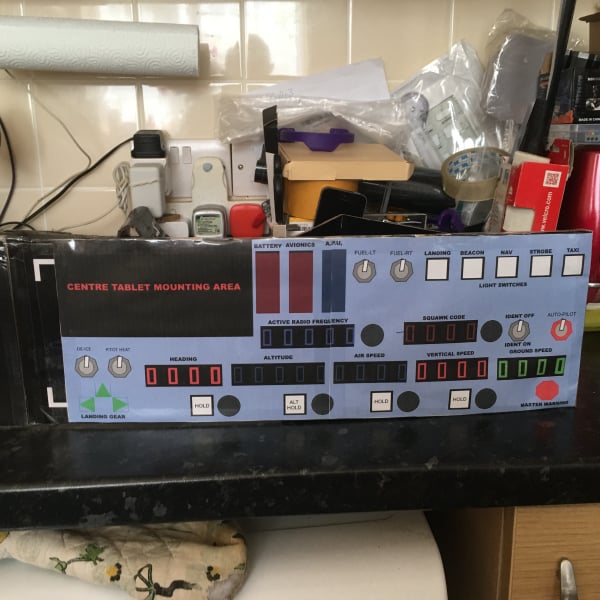
My Dashboard is a good example of this, the original perspex plates holding the buttons for driving were no longer suitable, and a new plate that could be fixed to the sliding shelf was needed, enabling the change over from Driving to Flight controls. Many various ideas were tried, and Dashboard layouts have been changed numerous times, and I am still making final adjustments to the cardboard template before I finally cut the latest version out of perspex.

When making templates you can get so carried away with looks that practicality gets forgotten, placing buttons or control knobs in positions that are too low and too close to the base that you cannot turn them, or behind the yoke handles making them inaccessible, or segment display panels that are not 100% visible when turning the yoke. Drilling out Perpsex for round buttons is quite simple, but cutting out rectangular holes for display boards and certain switches is much harder to do, so you definitely want to create a few variations out of a cardboard box and a permanent marker, or design it on computer and print out plans that you can stick onto card before you make the real thing.
Get it right first, and then transfer it to perspex or whatever medium you decide to build with!

I still need to  build a detachable centre mounting for the Airbus Flight joystick when used as a helicopter 'Cyclic' or for use when flying military style jets. This is going to attach centrally to the slide-out keyboard shelf, enabling me to quickly and easily remove and store behind the dashboard or on the outside of the rig.

I need to cut out the side panel a little, so that the Airbus Quadrant can be moved onto the shelf currently holding the second PCs keyboard, this will give room to mount another lever quadrant, (a Logitech Pro-Flight) which is narrow and has three levers. I have attached a piece of plumbing pipe over two of these levers, creating a helicopter 'Collective', which I need to mount to the right of my  Airbus quadrant above the second PC and will connect via the Arduino board.

Additional side panels will be created later which emulate the Radio unit and Navigation Units, these will also run via the Arduino boards.

I also have the option for the touch-screen tablets and lower 22" Monitors to use third-party software program called 'Air-Manager', with this I could select and display any panel (or part of) from MSFS 2020, to show the individual displays and various switches for the many different aircraft.

But then it's an on-going project, so liable to be constantly modified and improved.

Joy-to-Key

Sometimes you need to use a certain key or key combination to operate an action, yet assigning this key to the button you desire is impossible due to the program not accepting it.  'Joy-to-Key' is a free to use program that enables you to assign options to any keys you choose.
It can auto-start with windows, and it can automatically determine which game or program you are using and select the correct profile. Multiple profiles can be created to match all your games/simulators, enabling you to use button boxes (or for example my Indicator Stalk Unit) to work across the entire range of my driving simulators, and also with GTA 5.

ALWAYS MAKE A TEMPLATE

or Ten!
Version 2

Practical to look at, NOT to use!
Couldn't reach light control buttons when behind yoke. Obscured centre tablet.

Version 3

Better but not perfect. Centre tablet changed to sit on the panel. 
Selector knobs still difficult to use behind yoke. Missed tyhe ignition key and start button, so
more adjustments needed.

Always try in-situ

What looks good on paper, may not be as good when in place.
Always make a template and check to make sure it does not obscure screen/displays, or foul switches and controllers.

Mobirise Website Builder
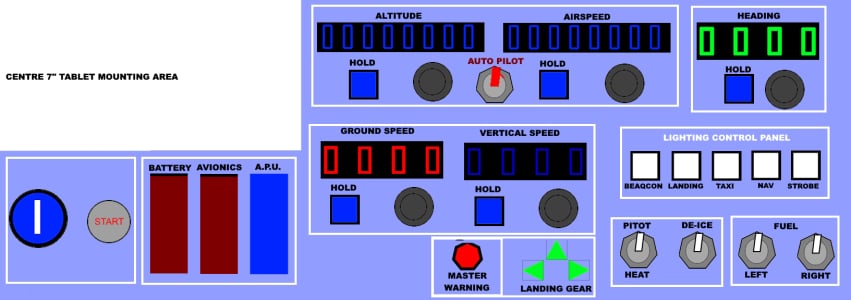
Version 4 Template

Less is sometimes more, kept only what I really need during flight, removed radios to give more room.

Mobirise Website Builder
Version 4 Mock-Up

Printed out to size and stuck to cardboard, finally happy everything is easily accessible. The darker blue area sits behind steering wheel and hosts buttons for OBS/Recording, and very basic controls for driving. White area is where the 7" tablet will show Speedometer/Flight Level Indicator using Sim-Dashboard.

Mobirise Website Builder
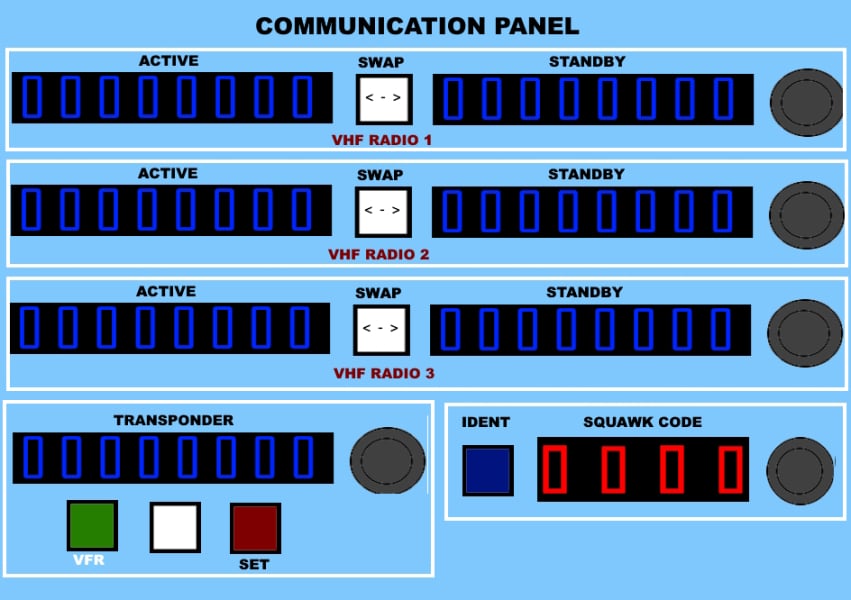
Communication Panel

Two separate side mounted panels will house the radio communications and navigation.

Already there is a Version 4.1
I decided to fill the spaces between the wheel and yoke, and to the right of the yoke with button boxes. These would give support for the upper panel to rest on, and bolt to.
Moving the Ignition Key, Start button, and fitting a rotary knob to use for trim control on one box, Fitting the three protected flip switches to another to mount under the shelf. And fitting six momentary buttons to the centre box which will have a reset button for my Eye-Tracker, and buttons to operate basic regularly used keys such as Enter, Esc, Pause so that they can be operated without removing hands from the wheel or yoke.

Share this Page!

Comments Page

.....

Martin Smith

Client

.....

Jessica Brown

Client

No Code Website Builder